A transfer safety checklist gives you something better than guesswork. When you are helping someone move from bed to chair, chair to toilet, or wheelchair to car, small details decide whether the move feels smooth or becomes a near-fall. Locked brakes, clear floors, proper footwear, enough strength to stand, and good communication all matter more than trying harder in the moment.
This guide gives you a practical checklist you can print, review, and keep near the places where transfers happen most. It is meant for family caregivers, paid home caregivers, and anyone who wants a safer routine instead of making up the plan from memory each time. If you want the full big-picture overview first, start with the mobility and transfers master guide.
Who Needs This Checklist or Template
This checklist helps most when transfers happen often and more than one person may be involved in care.
Use it if:
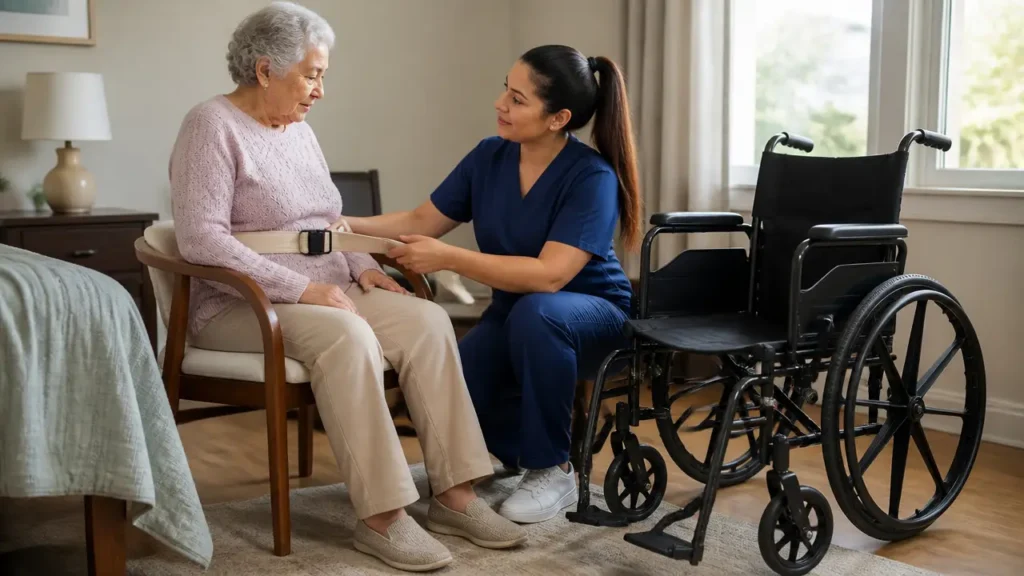
- you help someone with bed-to-chair, chair-to-toilet, wheelchair, recliner, car, or shower transfers
- the person has weakness, poor balance, stroke changes, pain, fatigue, or fear of falling
- one caregiver says a transfer is easy while another says it feels unsafe
- there has already been a near-fall, a buckle, a grab at your neck, or a rushed unsafe move
- you are training a new family helper, home aide, or respite caregiver
- the person is changing equipment and you need a clear home routine
It is especially useful when the person's ability changes from day to day. Someone may do well in the morning, then be much weaker after poor sleep, pain, infection, dialysis, or a long outing. That is why a transfer plan should always start with a quick check of today's readiness, not just yesterday's success. If you need help sorting that out, read how to assess transfer readiness and mobility levels.
This checklist is not a replacement for clinical instruction. If a therapist has already given you specific transfer directions, hip precautions, weight-bearing limits, sling instructions, or stroke-specific cues, those instructions come first. Use this checklist to support the plan, not to override it.
What to Include
A good checklist should be short enough to use but specific enough to stop common mistakes. The goal is to catch red flags before the person is half-standing and you are already committed.
The safest version includes five parts:
- the person's current readiness
- the room and destination setup
- the equipment check
- the steps for the transfer itself
- the stop signs that mean do not continue
Printable Transfer Safety Checklist
Copy this section into a note, print it, or tape it inside a care binder.
Before Every Transfer
- Ask how the person feels right now: dizzy, weak, short of breath, confused, nauseated, or in pain
- Confirm the person is awake enough and able to follow simple cues
- Check whether they can bear weight today or if that has changed
- Make sure shoes or socks are non-slip
- Clear cords, rugs, clutter, pets, and footstools from the transfer path
- Turn on enough light, especially at night
- Position the destination surface close enough to avoid overreaching
- Lock wheelchair or commode brakes
- Move wheelchair footrests or leg rests out of the way
- Check bed, chair, toilet frame, or grab bars for stability
- Put the walker, cane, or rollator in the right place after the transfer, not in the person's hands while they stand
- Apply the gait belt if the care plan says to use one
- Review the cue you will use: "lean forward, push up, stand, pivot, reach back, sit"
During the Transfer
- Have the person scoot to the edge before standing
- Keep their feet flat and placed well under them if possible
- Ask them to push from the bed or chair, not pull on the walker
- Stand close with a wide base and bent knees
- Keep your back straight and pivot with your feet instead of twisting
- Count out loud so both of you move together
- Stay calm and use one-step instructions
- Pause if the person freezes, looks pale, or says they feel faint
- Guide the hips and trunk toward the destination instead of dragging with the arms
- Ask the person to reach back before sitting
After the Transfer
- Make sure the person is fully back in the seat, not perched on the edge
- Reposition feet on footrests or the floor
- Confirm the person feels stable and not dizzy
- Check pain, skin pinching, and sling or clothing bunching
- Place call bell, walker, glasses, water, and needed items within reach
- Record anything unusual so the next caregiver knows
Stop and Get More Help If
- the person suddenly cannot bear weight
- the knees buckle and you cannot control the movement
- the person becomes confused, very sleepy, or stops following cues
- there is sharp pain in the hip, back, shoulder, or leg
- the person strongly resists, panics, or grabs unsafely
- you are trying to lift more than you can control safely
- the move now needs two people, a sit-to-stand aid, or a full lift
This kind of checklist works best when it matches the real transfer method. A stand-pivot transfer will not look the same as a bed-to-chair transfer step by step, a slide-board move, or a lift-assisted transfer. If your home uses more than one method, make separate versions instead of forcing every transfer into one generic list.
Equipment Details Worth Adding
The most useful checklists include a few blank lines for equipment and setup details, such as:
- strongest side or weaker side
- usual transfer direction
- whether a gait belt is required
- whether a transfer board is allowed
- whether the person can use a sit-to-stand lift or needs a full mechanical lift
- seat height or bed height notes that make the move easier
- toileting, nighttime, or car-transfer differences
Those details matter because "assist with transfer" is too vague. One person may think that means a steadying hand. Another may think it means lifting the person's full weight. If you need a fuller handoff tool for multiple caregivers, pair this article with a mobility and transfer care plan template.
How to Use It in Real Life
The biggest mistake is printing a checklist once and never looking at it again. For it to help, it has to be part of the routine.
Start by choosing the one or two transfers that cause the most stress. For many families, that is bed to wheelchair in the morning and toilet transfers at night. Write the checklist around those exact situations first. A checklist taped beside the bed can be different from the one kept near the bathroom.
Keep the wording concrete. Instead of "assist as needed," write what actually works:
- "wheelchair at 45 degrees to bed"
- "lock brakes before feet hit floor"
- "transfer toward stronger side"
- "use gait belt every time"
- "do not let him pull on rollator"
If more than one person helps, review the checklist together. That quick conversation prevents the common problem where one helper uses cues that work and another helper uses speed and force. Consistent wording also helps people with dementia, stroke, or fear of falling. If the person has one-sided weakness, use the same stronger-side setup each time unless therapy has changed the plan. You can review those stroke-specific issues in mobility after stroke and one-sided weakness strategies.
Use the checklist before the move, not only after something goes wrong. It should take less than a minute for a familiar transfer. If it takes much longer, the checklist is probably too wordy and needs trimming.
For new caregivers, treat the checklist as a training sheet. Walk through the room setup first, then the equipment, then the transfer cues. A written routine is also useful when you need respite care or home health visits because it reduces the risk that someone will improvise in your home layout.
If the checklist keeps showing repeated red flags, do not just keep checking boxes. That is the point where you step back and change the plan. Repeated buckling, near-falls, and increasing caregiver strain often mean the person has outgrown a one-person manual transfer and now needs a full-body lift or sling system or hands-on retraining.
When to Update It
Update the checklist any time the person, the equipment, or the environment changes.
Common reasons to revise it include:
- a new fall or near-fall
- new weakness, illness, swelling, or fatigue
- worsening pain
- recent surgery or new precautions
- new wheelchair, walker, commode, bed, lift, or sling
- a new caregiver joining the routine
- more trouble with nighttime transfers
- a move to a different bedroom, bathroom, or home setup
You should also update it after any transfer that feels different, even if nobody fell. Near-falls are warning signs. So are "I barely caught him," "she almost slid off," or "I had to yank harder than usual." Those moments belong on paper so the next caregiver does not assume the old method is still safe.
Night transfers deserve their own review. Dim rooms, sleepiness, and rushing to the bathroom increase risk even when daytime transfers still look fine. If night movement is part of the problem, add night transfer lighting and setup ideas so the checklist matches the real conditions.
If the person has already ended up on the floor, update the checklist after you review what happened. The plan may need a clear section for floor recovery, second-person help, or when to stop and call for medical help. For that situation, see safe floor-to-chair methods after a fall.
Common Mistakes
The most common checklist problem is making it too vague. A vague checklist gives everyone false confidence because it sounds organized without telling anyone what to do.
Another mistake is copying the routine from weeks ago even though the person's strength has changed. Transfers are dynamic. Pain, infection, dehydration, medication changes, and poor sleep can all change what is safe in a single day.
Watch out for these frequent errors:
- skipping the readiness check because "this transfer is routine"
- letting the person pull on a walker or rollator to stand
- forgetting to lock brakes because you are in a hurry
- keeping footrests in place and creating a trip point
- relying on your arms and back instead of close setup and pivoting
- treating a near-fall as bad luck instead of a warning
- assuming one helper can keep doing a transfer that now clearly needs more support
- not writing down what happened for the next caregiver
There is also a bigger planning mistake: using a checklist when you really need a different transfer method. If the person is no longer weight-bearing, cannot follow cues, or keeps collapsing mid-transfer, the answer is not a better memory aid. The answer may be a Hoyer lift workflow or a therapist review.
Frequently Asked Questions
Should I print one checklist for the whole house?
Usually no. One short checklist per common transfer area works better than one long universal sheet. Bed, bathroom, car, and nighttime transfers often need different setup notes.
How often should we review the checklist?
Review it any time there is a change in strength, pain, equipment, caregivers, or fall risk. Even without a major event, a quick review every few weeks helps catch outdated instructions.
Can a checklist replace transfer training from a therapist?
No. A checklist supports good habits, but it does not replace hands-on training, medical precautions, or equipment instruction from a PT, OT, or nurse.
What if one caregiver thinks the transfer is safe and another does not?
Use the more cautious view until you reassess the transfer together. Different opinions usually mean the written plan is too vague or the person's ability has changed.
Should the checklist include exact cue words?
Yes. Short, repeatable cues such as "scoot forward," "feet back," "push up," "pivot," and "reach back" help keep everyone consistent.
When should we move from manual transfers to a lift?
Move up to more support when the person cannot reliably bear weight, stops following cues, repeatedly buckles, or requires more lifting force than you can safely control. That can mean a sit-to-stand device or a full lift.
What if the person starts to fall during the transfer?
Do not try to catch and lift with your back. Guide the person down as safely as you can, protect the head if possible, and reassess before moving again. Then update the checklist so the near-fall does not repeat.
Is it okay to use the same checklist forever if it has worked so far?
No. A good checklist changes with the person. What worked three months ago may now be risky because of weakness, swelling, pain, fear, or new equipment.
Keep this checklist with your transfer supplies, then build out the full plan with the mobility and transfers master guide, transfer readiness levels, and the more detailed mobility and transfer care plan template.