A gait belt can make transfers safer, but only when it is used for the right job. It gives the caregiver a secure handhold while a person stands, walks, turns, or moves from one surface to another. It is not a lifting strap, a restraint, or a way to force someone upright.
That difference matters. A well-used gait belt can help you guide movement, steady a small loss of balance, and protect your own back. A badly used belt can ride up into the ribs, pull on painful skin, give a false sense of control, or turn a one-person job into an unsafe lift.
If you are new to transfers, read the mobility transfers master guide first. If you already know you need a belt and are comparing styles, the best gait belts guide can help with handle, buckle, and material choices.
Quick Answer
A gait belt is safest when the person can help with the transfer but needs steadying. Place it over clothing, fit it snugly with a little finger room, and use it to guide the person's movement. Do not use it to lift someone who cannot bear weight or follow cues.
When to Use This
Use a gait belt when the person can help with the movement but needs steadying. That may include standing from a chair, walking a few steps, turning to sit, moving from bed to wheelchair, getting into a car, or practicing a short walk with a walker.
The person should be able to bear some weight, follow simple cues, and participate in the task. A gait belt works best when it adds control to a transfer that is already possible. It does not replace leg strength, judgment, or the need for a second helper.
A belt is especially useful when the caregiver otherwise would grab clothing, hold under the arms, or pull on the person's hands. Those grips are weaker and can hurt. A belt gives a clearer place to hold without squeezing the shoulders or yanking the arms.
Do not use a gait belt as the main tool for someone who cannot stand, cannot follow directions, is falling repeatedly, or needs to be lifted. That situation may need a sit-to-stand lift, full-body lift, transfer board, or two-person assist. If you are unsure, compare sit-to-stand lift setup and two-person assist basics.
Before You Start
Check the person's body first. A gait belt usually goes over clothing around the waist or lower trunk. Avoid placing it over open wounds, fresh surgery sites, feeding tubes, ostomy areas, painful ribs, chest trauma, fragile skin, or medical devices that could be pulled. If the person has poor skin sensation, diabetes, poor circulation, or unusual pain, be extra cautious.
Ask before you tighten the belt. The person may know about a tender spot you cannot see. A belt should feel secure, not painful. If it restricts breathing, presses on the ribs, or makes the person anxious, stop and adjust the plan.
Inspect the belt. Look for frayed fabric, cracked vinyl, broken stitching, weak handles, loose buckles, or a clasp that opens too easily. Do not use a damaged belt. A belt that fails during a transfer can cause a fall.
Choose the right style for the setting. Cotton belts can feel softer, but they may need laundering. Vinyl-coated belts are easier to wipe clean. Belts with handles can make hand placement easier, especially for caregivers with smaller hands or when side support is needed. Whatever style you choose, follow the manufacturer's cleaning and inspection instructions.
Set up the environment before the belt goes on. Lock wheelchair brakes. Move footrests. Clear rugs, cords, pets, oxygen tubing, and clutter. Place the walker or destination chair where it belongs. If the transfer involves standing from a chair, review sit-to-stand using a gait belt for the full sequence.
How to Fit the Belt
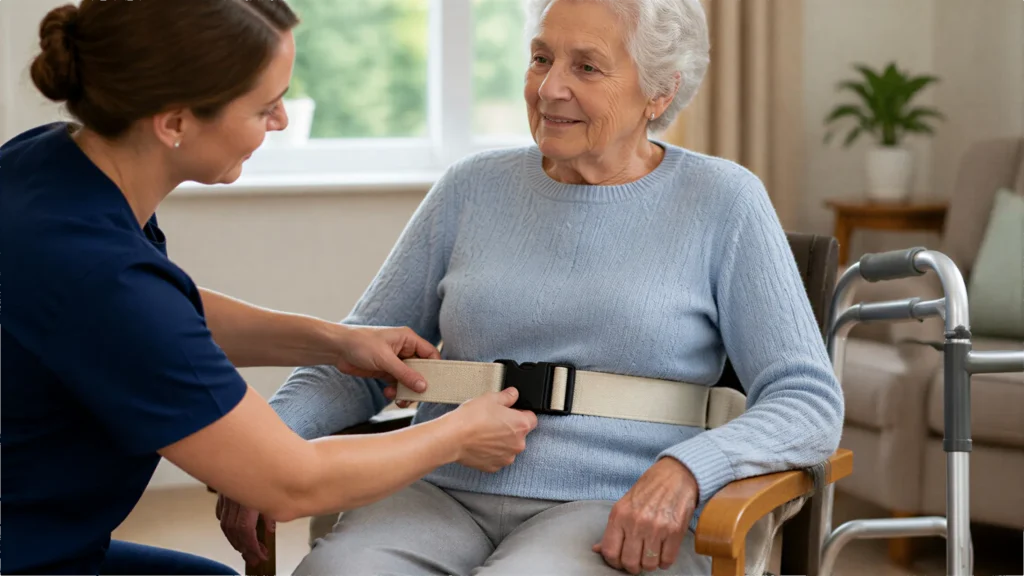
Place the belt over clothing, not bare skin. Position it around the waist or lower trunk where it will not press into the ribs. The buckle should close securely. Many caregivers keep the buckle slightly off-center or away from the caregiver's main grip so it does not dig into the body.
Tighten the belt so it is snug. You should be able to slide a couple of fingers between the belt and the person's body. Too loose, and the belt can ride up or slip. Too tight, and it can hurt, restrict breathing, or create fear before the person even stands.
Tuck loose belt ends out of the way. A dangling end can catch on a walker, wheelchair, commode, or caregiver hand. If the person may try to release the buckle during the transfer, position and manage the buckle according to the clinician's instructions.
Ask one last comfort question before standing: "Does this pinch or press anywhere?" If they say yes, fix it before moving. Do not assume discomfort is normal.
Step-by-Step Technique
Start close. Stand in front and slightly to the side of the person, depending on the transfer. Keep your feet apart, knees soft, and back as straight as you can. The goal is to move with your legs, not pull with your back.
Give a clear plan. Say where you are going, what count you will use, and what the person should do with their hands. For most sit-to-stand transfers, the person should push from the chair or bed, not pull on the walker and not pull on your neck or arms.
Use an underhand grip when possible. Slide your fingers up under the belt from below rather than grabbing from the top. This gives a stronger grip and often keeps your wrist in a better position. If the belt has handles, use the handles that let you stay close without twisting.
Count together. "Nose over toes. Push on three. One, two, three." As they stand, guide their trunk forward and up. Do not jerk. A rocking motion is often safer than a sudden pull.
Once standing, pause. Let the person find balance before stepping. Check their face, breathing, knees, and foot position. If they feel dizzy or weak, sit back down.
During walking, stay close to the weaker side or the side where balance tends to fail. Keep one hand on the belt and the other ready to guide at the back or side of the belt. Do not drag the person forward. Match their pace.
When turning to sit, slow down. The belt helps you guide the turn, but the person still needs to feel the chair behind their legs before sitting. If turning is the hard part, read pivot versus sliding transfers before trying harder transfers.
Safety Checks and Common Errors
The biggest error is treating the belt like a lifting device. A gait belt is for steadying and guiding. If you are holding most of the person's body weight, the task is too heavy for a simple belt.
Another error is placing the belt too high. A belt that rides into the ribs can hurt and may make breathing harder. A belt placed too low can slide off the hips. Recheck placement after the person stands because clothing and body shape can shift the belt.
Do not grab the person's arms or shoulders while also using the belt. That can twist the upper body and increase injury risk. Keep the person close, use the belt for guidance, and let their legs do as much of the work as they safely can.
Do not ignore communication. Ask if they are ready. Tell them before you move. Listen if they say the belt hurts or they feel weak. Fear and surprise can make the person stiffen, pull away, or sit too soon.
Clean and store the belt properly. Reusable belts should be cleaned according to the material and instructions. Store clean belts away from soiled items. Do not keep using a belt that smells, has body fluid contamination that cannot be cleaned, or has worn hardware.
If a fall starts, do not try to muscle the person upright. Widen your stance, bend your knees, keep hold of the belt if it is safe, and guide them down while protecting the head and spine as much as possible. Then follow your fall plan. The guide on what to do if a transfer starts to fail is worth reading before you need it.
When to Stop or Get Help
Stop if the person cannot stand with the agreed help, their knees buckle, they become dizzy, they have chest pain or severe shortness of breath, or they cannot follow the sequence. Stop if the belt slips, hurts, or catches on medical equipment.
Get clinical help if you are unsure whether the person can bear weight, if they recently had surgery, if they have new weakness, or if transfers are getting harder. A physical therapist or occupational therapist can teach the right hand placement, transfer direction, and equipment level.
A one-person gait belt transfer is not a badge of success. Sometimes the safer plan is a second helper, a lift, a transfer pole, a different chair height, or a wheelchair setup change. Good caregiving means choosing the method that fits today's body, not forcing yesterday's routine.
Frequently Asked Questions
What is a gait belt used for?
A gait belt gives a caregiver a secure handhold while helping someone stand, walk, turn, or transfer. It is used to steady and guide movement. It is not meant to lift someone who cannot help.
How tight should a gait belt be?
It should be snug enough that it does not slip, but not painful or restrictive. A common fit check is being able to slide a couple of fingers between the belt and the person's body.
Where should a gait belt sit?
It usually sits over clothing around the waist or lower trunk, away from the ribs, wounds, tubes, painful areas, and fragile skin. If normal placement is unsafe, ask a clinician for another method.
Are gait belts with handles better?
Handles can help some caregivers get a steadier grip and reduce hand strain. They are not automatically safer if the belt fits poorly or the transfer needs more help than one caregiver can provide.
When should you not use a gait belt?
Avoid using one over wounds, painful ribs, fresh abdominal surgery, feeding tubes, ostomy areas, or fragile medical sites. Also avoid relying on a belt when the person cannot bear weight or needs to be lifted.
Once the belt setup is clear, match it to the task. For bed moves, review bed-to-chair transfer steps. For comfort problems, check proper gait belt placement. If the transfer is still too heavy, compare home transfer aids before trying to pull harder.